Creating Your First Booking
In this tutorial, you’ll create your first Booking, Customer, and Departure Service through the G Adventures API.
Now that you’re displaying trips from the G Adventures API, it’s time for the next step; Getting customers booked on trips.
When you wish to book a customer on a trip, you’ll be booking them on a departure service, but before we can do that we must create the booking, as well as the customer. Let’s review all these steps and book a customer on a trip.
When building out a checkout journey, we recommend creating the customers and services before taking payment. The following flow is generally recommended:
Customer selects one or more departure’s they’d like to book
System requests customer information. For check out and confirmation, we recommend capturing the base needs always (e.g. Full legal names, country, date of birth, nationality). Your system can review the
CONFIRMATIONrequirements of the selected departure’s if applicable and request those as well.Upon customer saving information, system creates booking, departure service(s) and customer(s).
Customer is presented with a payment page if applicable. You can use our payments API, or you can take payment through Sherpa. By having created the departure service prior to payment, you are also able to display
depositinformation on payment page from reading the departure service object. See Deposits for more info.Customer is presented with confirmation page with Booking number
Ensuring Your Agency Status Is Setup
For an Application in the G Adventures API to create bookings, it must be bound to an
Agency Code. An Agency Code is a unique set of digits that is bound to your
particular agency. Generally, if you are looking to book services via the
G Adventures API then you will have spoken to a sales representative from G Adventures
who has worked with you to setup a contract. If this is something you need to
accomplish, we do recommend sending us an email to begin this conversation.
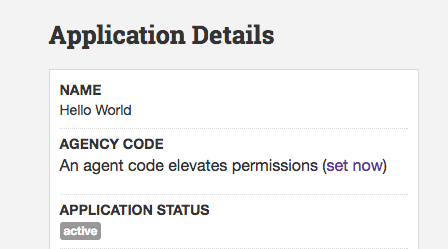
To add your Agency Code to your application, simply visit your application
dashboard and modify this value:
Once it’s been modified, you will receive an email to confirm that you are the owner of this application, and will be able to authorize its usage against your agency. This is an important step in order to ensure the security of your data.
Once authorized, you will be able to create services and bookings via the
test environment. This will allow you to do everything referenced in the
tutorial below. Once you’ve completed your integration and are looking to
release it in production, you can email us to begin the process of authorizing your
application for production release.
Creating The Booking
Bookings within the G API are simply containers for one or more service. A service can be a departure service, activity service, transport service, and so on. Since the booking is just a container, the details necessary to create one are fairly slim.
POST /bookings/ HTTP/1.1
Host: rest.gadventures.com
Accept: application/json
Content-Type:application/json

{
    "currency": "CAD",
    "external_id": "FUN1"
}
That’s it! You’ll receive a response from the G Adventures API with a few more details, that will look like so:
HTTP/1.1 201 CREATED
Content-Type: application/json

{
  "id": "628360",
  "href": "https://rest.gadventures.com/bookings/628360/"
  "external_id": "FUN1",
  "currency": "CAD",
  "date_created": "2017-09-13T17:18:06Z",
  "date_closed": null,
  "date_of_first_travel": "2017-09-13",
  "date_of_last_travel": "2017-09-13",
  "balance_due_date": "2017-09-13",
  "amount_paid": "0.00",
  "amount_owing": "0.00",
  "commission": "0.00",
  "tax_on_commission": "0.00",
  "agent": {
      "id": "49284",
      "href": "https://rest.gadventures.com/agents/49284"
  },
  "services": {
      "href": "https://rest.gadventures.com/bookings/628360/services"
  },
  "invoices": {
      "href": "https://rest.gadventures.com/bookings/628360/invoices"
  },
  "payments": {
      "href": "https://rest.gadventures.com/bookings/628360/payments"
  },
  "refunds": {
      "href": "https://rest.gadventures.com/bookings/628360/refunds"
  }
}
At this point, you are able to query the new Booking through the API. If unsure of a specific attribute in the response, please see the bookings reference.
Next step, is to create the customer. A customer is not attached directly to a Booking, so you will notice in the request that the newly created Booking is not referenced.
Creating The Customer
The minimal set of details necessary for a customer are referenced in this request:
The date_of_birth format follows YYYY-MM-DD
The Nationalities id provides the value for nationality.id field
POST /customers/ HTTP/1.1
Host: rest.gadventures.com
Accept: application/json
Content-Type:application/json

{
    "name": {
        "legal_first_name": "G",
        "legal_last_name": "Corp",
        "title": "Mr"
    },
    "date_of_birth": "1980-10-05",
    "account_email": "g.corp@gadventures.com",
    "nationality": {
        "id": "40",
    },
}
And the response will contain the full customer representation.
HTTP/1.1 201 CREATED
Content-Type: application/json

{
    "id": "1323083",
    "href": "/customers/1323083",
    "name": {
        "legal_first_name": "G",
        "legal_last_name": "Corp",
        "legal_middle_name": null,
        "common_name": null,
        "title": "Mr"
    },
    "date_of_birth": "1980-10-05",
    "place_of_birth": null,
    "nationality": {
        "id": "40",
        "href": "/nationalities/40",
        "name": "Canadian"
    },
    "passport": {
        "number": null,
        "issue_date": null,
        "expiry_date": null,
        "place_of_issue": null
    },
    "meal_preference": null,
    "meal_notes": null,
    "account_email": "g.corp@gadventures.com",
    "phone_numbers": null,
    "emergency_contacts": {
        "first_name": null,
        "last_name": null,
        "phone_numbers": null
    },
    "address": {
        "street": null,
        "city": null,
        "state": null,
        "country": null,
        "postal_zip": null,
        "latitude": null,
        "longitude": null
    },
    "bookings": {
        "href": "/customers/1323083/bookings"
    }
}
Finally, we’re going to compile all of this under a Departure Service.
Creating The Departure Service
Now, it’s time to piece everything together. We want to sell a specific departure. To do this, we use the departure service. Every service can have one or more customers on it, and is associated with a single booking. Once the departure service is created, availability of the related departure will be affected.
See Applying Promotions To Departure Services to apply a promotion when creating a departure service
Let’s take a look:
POST /departure_services/ HTTP/1.1
Host: rest.gadventures.com
Accept: application/json
Content-Type:application/json

{
    "booking": {
        "id": "628360"
    },
    "product": {
        "id": "420482"
    },
    "customers": [
        {
            "id": "1323083"
        }
    ]
}
And the response will of course, contain the full representation of the Departure Service.
HTTP/1.1 201 CREATED
Content-Type: application/json

{
    "id": "1162343",
    "href": "/departure_services/1162343",
    "name": "Indochina Discovery",
    "status": "Option",
    "status_transitions": ["Expired"],
    "type": "departure_services",
    "sub_type": "Tour",
    "start_date": "2013-12-07",
    "finish_date": "2014-01-05",
    "customers": {
        "id": "1323083",
        "href": "/customers/1323083",
        "name": {
            "legal_first_name": "G",
            "legal_last_name": "Corp",
            "legal_middle_name": null,
            "common_name": null,
            "title": "Mr"
        },
    },
    "date_created": "2013-09-13T18:42:47Z",
    "date_confirmed": null,
    "date_cancelled": null,
    "option_expiry_date": "2013-09-17T18:42:46Z",
    "purchase_price": "2549.00",
    "commission": "0.00",
    "applied_promotion": {
        "id": "25358",
        "name": "Promo for CAD",
        "promotion_code": "PFCAD",
        "discount_amount": "100.00",
        "commission_rate": null,
        "terms_and_conditions": null
    },
    "applied_promotions": [
        {
            "id": "25358",
            "name": "Promo for CAD",
            "promotion_code": "PFCAD",
            "discount_amount": "100.00",
            "commission_rate": null,
            "terms_and_conditions": null
        }
    ],
    "flags": [],
    "booking": {
        "id": "628360",
        "href": "/bookings/628360"
    },
    "documents": null,
    "product": {
        "id": "420482",
        "href": "/departures/420482",
        "name": "Indochina Discovery"
    },
    "rooms": {
        "code": "STANDARD",
        "name": "Standard",
        "customer": null
    },
    "incomplete_requirements": [
        {
            "type": "CONFIRMATION",
            "name": "Nationality",
            "code": "NATIONALITY",
            "message": "Nationality must be submitted for this product. 'nationality' must be set in the customer resource.",
            "customer": {
                "id": "1323083",
                "href": "/customers/1323083",
                "name": {
                    "legal_first_name": "G",
                    "legal_last_name": "Corp",
                    "legal_middle_name": null,
                    "common_name": null,
                    "title": "Mr"
                },
            }
        },
    ],
    "arrival_flight_details": [],
    "departure_flight_details": [],
    "international_ticket_numbers": [],
    "traveller_heights": []
}
At this point, you have successfully booked a customer on a specific Departure.
You’ll see that the Departure Service has a status of Option. You can
Confirm a service by reviewing the incomplete_requirements and updating
the relevant customer records to meet those requirements. For further
information, please review the departure service documentation.
Handling Merged Customers When Creating Services
At times, when creating the Departure Service (or technically, any service), you’ll receive a response which looks like the following:
HTTP/1.1 410 GONE
Content-Type: application/json

{
    "message": "Customer 1941170 was merged with customer 1940018. Please
      re-submit your request with customer 1940018.",
     "errors": [
      {
        "code": "MERGED_RECORD",
        "field": "customer.id",
        "value": 1940018
      }
     ],
     "time": "2017-10-01T20:08:30",
     "http_status_code": 410
}
This can occur if the customer you are referencing or have created (even very recently) was merged with another customer in the G Adventures API.
The reasoning for this is because upon creation of a customer, an asynchronous process is run to ensure the customer is not created as a duplicate within our reservation system, thus ensuring your data is clean and accurate. If a duplicate is found, the customer record you just created will now redirect to an existing customer record, that was found by this duplicate identification process.
There’s two approaches you can take to work around this.
First, you can do a GET request on the customer.id you’ll be passing into the creation of the service
object. Upon doing the GET, you will either receive a 200 OK or a 301 Redirect. If you receive the latter,
it means this customer was indeed merged and you’ll be redirected to the new customer.
Once redirected, you can capture the new customer id and use that in the creation of your service. Essentially, the flow is like so:
GET /customers/{id}
Redirected With 301? Capture customer id from response
Not Redirected? Don’t change anything
POST service with whatever customer id is relevant (same, or redirected)
Note that many HTTP clients within frameworks do auto-redirect of 301 and in some cases make that action invisible to the developer.
Another solution for this is to have exception handling for this scenario. Capture
the 410 GONE status code and identify if MERGED_RECORD is within
code attribute for the errors list.
Once you’ve identified the exception, you can take the new Customer ID from the
value field, and re-post your Departure Service with it, just like you had
previously.